Learning how to shape a loaf of bread for a pan is an essential skill for a home bread baker. Imagine you’re in the mood for a sandwich loaf, so you’ve decided to make a classic white bread recipe. Or maybe you want to make something a little more wholesome, so you’re trying your hand at a whole grain sandwich loaf. Either way, once you make your dough and it starts rising, it will soon be time to shape it to fit your pan. In this post, I’ll provide a video and explanation showing how to shape a loaf of bread for a pan.
Choosing the Right Pan or Tin
The most common size of pan (or tin) for baking bread seems to be the “two pound loaf tin.” This type of pan holds, you guessed it, two pounds (or around 900g) of dough. While there are multiple different pan shapes that can be considered 2 pound loaf tins, one of the most common styles is around 9″x4″x4″ in size. The specific measurements can vary from pan to pan, but this general size seems to be the most popular. The pan that I recommend using, and the one I use in the video, is a Small Pullman Pan. Even though this pan is my favorite, the method of shaping I show you in the video can work with any pan.
You can view all of the baking tools that I use, including pans, over on my Recommended Baking Tools page.
Once you’ve got the pan you want to use, let’s get shaping! I’ll start with the written instructions for how to shape a loaf of bread for a pan. If you want to skip directly to the video tutorial down below, feel free to keep scrolling 🙂
10 Steps to Shaping Your Loaf of Bread
1. Pre-shape the dough into a ball. Once your dough has gone through bulk fermentation, transfer it from its container onto a lightly floured counter. Stretch and fold the corners of the dough over the middle until you form a smooth ball of dough. Then flip the dough over onto a clean part of your counter.

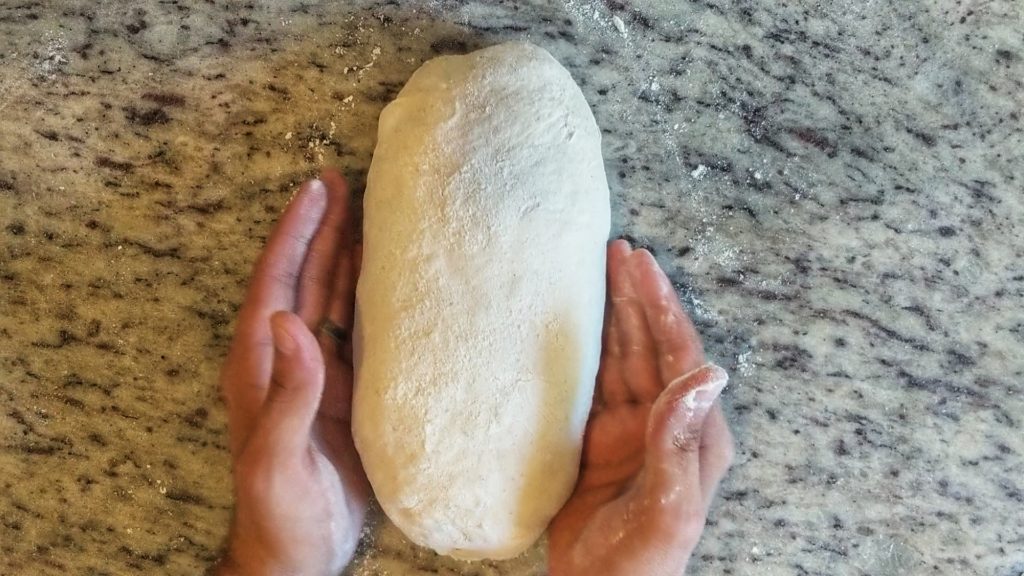
2. Create tension. Create tension in the ball of dough by cupping and pulling the dough with your hands or a bench scraper. See the video to watch exactly how I do this. Steps one and two are important for building structure and tension in your loaf of bread before you even give it its final shape. Don’t be tempted to skip these steps, since they’ll make your final loaf look a lot better!
3. Let the dough rest. Now cover the dough with a kitchen towel and let it rest. This step is sometimes called the “Bench Rest.” Generally speaking, you can let it rest for 15 minutes if it’s a yeasted loaf and 30 minutes if it’s a sourdough loaf. This rest will allow the gluten to relax so we can more easily shape the dough later.
4. Prepare the dough for its final shape. After the rest period, it’s time to give the dough its final shape. So, uncover the rested dough and sprinkle the top with a little bit of flour. Then, flip the dough over on the counter so the seam side of the dough is now facing up and the floured side is facing down.
5. Spread the dough into a disc. Gently dimple the dough with your knuckles and fingertips so it spreads out into a disc. This knocks a little air out of the dough and makes the dough more shapeable.

6. Fold the dough into a triangle. After a disc is formed, it’s time to fold the dough into somewhat of a triangle shape. Grab the two corners that are closest to you and fold the dough over itself creating a seam in the middle. The side of the dough farthest from you should now be narrow and the side closest to you should be a little wider. Thus, somewhat of a triangle. The wide side of the dough should be almost as wide as the width of your pan. If it’s just a little bit smaller than your pan when you shape it now, it will be the perfect size!


7. Tuck and roll the dough into a log. Now roll up the dough using the “tuck and roll” technique starting at the narrow end and rolling towards you.
8. Close up the seam. Once you roll the dough into a log, tuck the edges underneath and pinch the seam of the dough closed.
9. Create a non-stick surface on the dough. Then sprinkle a little bit of flour around the loaf to create an extra non-stick layer on your dough. This extra step helps my bread release easily from my pan every time.
10. Gently transfer the dough into the pan. Lastly, grab your loaf carefully on both ends and drop it graciously into your loaf pan with the seam-side-down.

And that’s how you shape a loaf of bread for a pan! Of course there are many ways to get this done, but this is a method I learned and it works for me every time.
Video – How to shape a loaf of bread for a pan
If you have any other tricks that you use for shaping a loaf of bread for a pan, let me know in the comments below.