The following recipe for a basic, high-hydration sourdough bread is easy to follow and only requires four simple ingredients. If you’ve been intimidated by sourdough bread recipes with 80% hydration or more, don’t be! This recipe is for you.

Why This Recipe Works
This recipe makes a dough that is 80% hydration (for every 100 grams of flour there are 80 grams of water). That’s relatively high in water compared to other simpler sourdough recipes. Normally, more water leads to a stickier and harder-to-handle dough, which is why many people avoid high-hydration recipes.
Stickiness isn’t much of a problem with this recipe. With a few rest periods and some simple stretch and folds, you’ll transform this high-hydration dough into something that is manageable and easy to shape. Speaking of shaping, I’ll also show you a very easy shaping technique so that shaping this dough into an oval will be a breeze.
Ingredients You’ll Need
- Bread Flour: I used King Arthur bread flour for this recipe. You can use any plain white bread flour that contains around 11-13% protein.
- Water: Plain, un-chlorinated tap water is best. Use filtered water or bottled spring water if your city’s tap water contains harsh ingredients or has a bad taste.
- Sourdough Starter: You’ll need a 100% hydration sourdough starter for this recipe (fed with equal parts water and bread flour).
- Salt: I used Kosher salt for this recipe, but sea salt or plain table salt will also work well.
Note: See recipe card below for full ingredient amounts and quantities.
Substitutions and Additions
- If you want to add some whole grain to this recipe, you can replace up to 50 grams of the bread flour with whole wheat flour. Just replace the flour 1:1 and the bread will turn out great.
Ingredient Amounts
Starter Feeding
- Sourdough Starter, leftover – 25 grams
- Water – 50 grams
- Bread Flour – 50 grams
Main Dough
- Bread Flour – 450 grams
- Water – 350 grams
- Sourdough Starter, active – 100 grams
- Salt – 10 grams
Suggested Timeline
| Time | Step |
|---|---|
| 10:00 PM (Day 1) | Feeding the Sourdough Starter |
| 6:00 AM (Day 2) | Mixing the Dough |
| 6:30 AM | Stretch and Folds |
| 7:30 AM | The First Rise (Bulk Fermentation) |
| 12:30 PM | Shaping |
| 1:00 PM | The Second Rise (Final Proof) |
| 2:00 PM | Overnight Cold Proof |
| 10:00 AM (Day 3) | Baking |
| 12:00 PM | Serving |
How to Make Basic High-Hydration Sourdough Bread
Step-by-Step Instructions
Feeding the Sourdough Starter
Take 25 grams of leftover sourdough starter out of the fridge. Feed your starter 50 grams of water and 50 grams of bread flour. Mix the flour, water, and starter around in the jar until it has a pancake batter-like consistency. Mark the top of the starter with a rubber band and cover the top of the jar loosely with a lid. Let the starter rise at room temperature overnight, for around 6-8 hours, or until it doubles in size.
Mixing the Dough
The next day place a medium-sized mixing bowl on a digital scale to weigh out your ingredients. Add the water, salt, and 100 grams of sourdough starter to the mixing bowl and stir thoroughly to dissolve the starter. Then, add the full amount of bread flour. Mix the dough together with a spoon for 1-2 minutes to form a wet dough. Cover the bowl up with a kitchen towel and let the dough rest for 30 minutes.
Stretch and Folds
Next you will be performing three sets of stretch and folds with a half hour rest in between each set. This is an alternative to kneading that works well with high-hydration (wet) doughs. The dough will become stronger and better developed throughout this process.
First, uncover the dough and stretch and fold each of the four corners of the dough: grab an edge of the dough and stretch it into the air and then fold it down on top of the dough. Repeat this process with each of the four corners of the dough. (See video for a visual guide). Then, cover up the dough with the kitchen towel and let it rest for 30 minutes.
Perform a second set of stretch and folds followed by a 30 minute rest.
Then, perform a third and final set of stretch and folds. After that, flip the dough over so that the seam side is facing down inside the mixing bowl. Cover the bowl with a sheet of plastic wrap or a damp kitchen towel and now the dough is ready for the first rise.
The First Rise (Bulk Fermentation)
Move the bowl of dough to the side of your kitchen counter. Let the dough rise at room temperature for 4-6 hours, or until it almost doubles in size (a little bit less than double in size is OK). Then, carefully take the dough out of the mixing bowl and place it onto the un-floured kitchen counter to shape.
Easy Shaping Technique for Basic High-Hydration Sourdough Bread
Preshape the dough into a round ball by cupping and pulling the dough into a ball with your hands. Let the round ball of dough rest, uncovered, for 30 minutes on the kitchen counter. While the dough is resting, prepare an oval banneton basket by dusting it generously with bread flour.
After the dough has rested, dust the top of the dough with bread flour and spread it around to create a non-stick barrier on the dough. Flip the dough over so that the sticky side is now facing up. Fold the dough in half like a book and and press the two halves together so that they stick. Then, turn the dough 90° and fold the dough in half like a book once again. Pinch the seam of the dough closed. Your dough should now look like an oval that will fit perfectly into your banneton basket.
The Second Rise (Final Proof)
Cover the dough with a dry kitchen towel or banneton basket liner and let the dough proof for one hour at room temperature. This will give the dough a “head start” on proofing so that it will ferment properly in the cold environment of the fridge.
Note: If your dough already seems to be overproofed before the shaping step, you may want to skip the one hour of proofing at room temperature. Shaping the dough and moving it directly to the fridge is OK and it can stop the dough from becoming too overproofed.
Overnight Cold Proof
Once your dough has risen for one hour at room temperature, move the dough to the refrigerator to proof overnight in the cold environment, for around 8-12 hours. This will build flavor in the dough and the cold dough will be easier to work with the next day.
Baking
The next day, 30 minutes before you’re ready to bake, preheat your oven to 450°F (232°C) with a Dutch oven inside the oven to preheat as well.
When the oven is preheated, take your dough out of the fridge. Flip the dough out of the banneton basket and onto a sheet of parchment paper. Brush off the excess flour from the top of the dough and gently score the top of the dough in one long slash with a razor blade.
You can use get the same UFO bread lame that I use here. You’ll get an automatic 10% discount by using my affiliate link.
Transfer the scored dough into into your hot Dutch oven with the parchment paper and all. Close the Dutch oven lid and bake the bread for 20 minutes. Then, remove the lid and continue baking for another 15-20 minutes with the lid off. After 40 minutes of total baking time my bread was a dark golden brown.
Serving
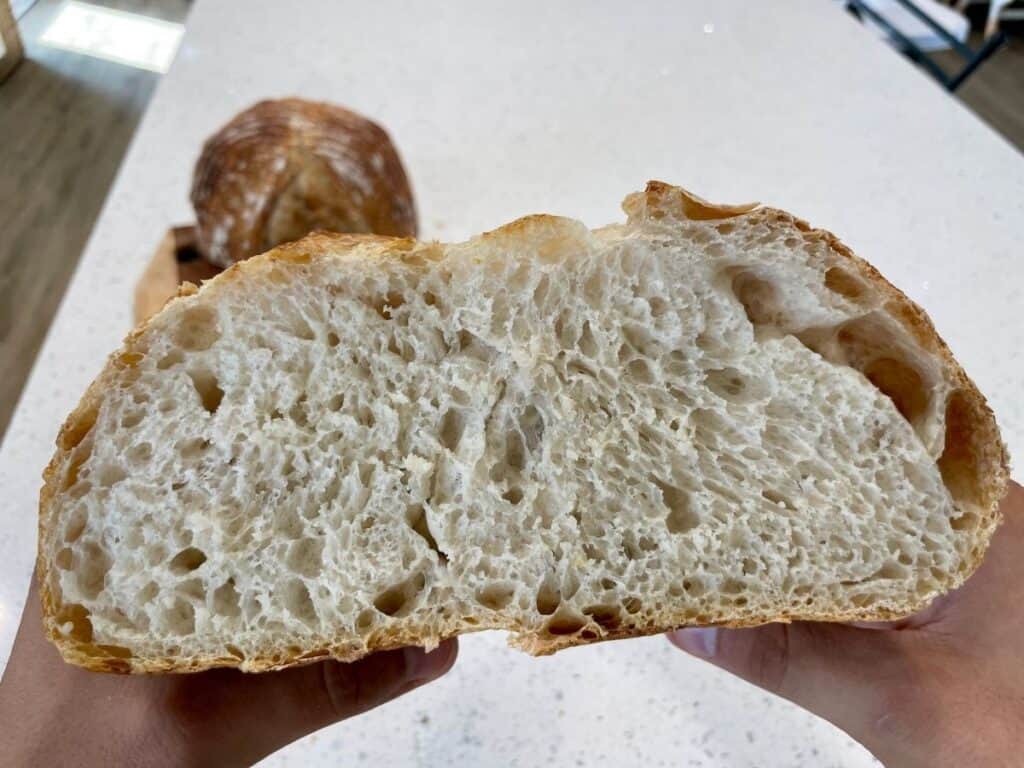
Let the bread cool for at least one hour on a wire rack before serving. Serve toasted slices of this high hydration sourdough bread with butter, jam, honey, or anything your heart desires. The moist, creamy, custardy interior of this bread is best enjoyed with simple toppings.

Basic High-Hydration Sourdough Bread

The following recipe for a basic, high-hydration sourdough bread is easy to follow and only requires four simple ingredients. If you’ve been intimidated by sourdough bread recipes with 80% hydration or more, don’t be! This recipe is for you.
Ingredients
Sourdough Starter Feeding
- Sourdough Starter, leftover - 25 grams
- Bread Flour - 50 grams
- Water - 50 grams
Main Dough
- Bread Flour - 450 grams
- Water - 350 grams
- Sourdough Starter, active - 100 grams
- Salt - 10 grams
Instructions
Feeding the Sourdough Starter
Take 25 grams of leftover sourdough starter out of the fridge. Feed your starter 50 grams of water and 50 grams of bread flour. Mix the flour, water, and starter around in the jar until it has a pancake batter-like consistency. Mark the top of the starter with a rubber band and cover the top of the jar loosely with a lid. Let the starter rise at room temperature overnight, for around 6-8 hours, or until it doubles in size.
Mixing the Dough
The next day place a medium-sized mixing bowl on a digital scale to weigh out your ingredients. Add the water, salt, and 100 grams of sourdough starter to the mixing bowl and stir thoroughly to dissolve the starter. Then, add the full amount of bread flour. Mix the dough together with a spoon for 1-2 minutes to form a wet dough. Cover the bowl up with a kitchen towel and let the dough rest for 30 minutes.
Stretch and Folds
Next you will be performing three sets of stretch and folds with a half hour rest in between each set. This is an alternative to kneading that works well with high-hydration (wet) doughs. The dough will become stronger and better developed throughout this process.
First, uncover the dough and stretch and fold each of the four corners of the dough: grab an edge of the dough and stretch it into the air and then fold it down on top of the dough. Repeat this process with each of the four corners of the dough. (See video for a visual guide). Then, cover up the dough with the kitchen towel and let it rest for 30 minutes.
Perform a second set of stretch and folds followed by a 30 minute rest.
Then, perform a third and final set of stretch and folds. After that, flip the dough over so that the seam side is facing down inside the mixing bowl. Cover the bowl with a sheet of plastic wrap or a damp kitchen towel and now the dough is ready for the first rise.
The First Rise (Bulk Fermentation)
Move the bowl of dough to the side of your kitchen counter. Let the dough rise at room temperature for 4-6 hours, or until it almost doubles in size (a little bit less than double in size is OK). Then, carefully take the dough out of the mixing bowl and place it onto the un-floured kitchen counter to shape.
Shaping
Preshape the dough into a round ball by cupping and pulling the dough into a ball with your hands. Let the round ball of dough rest, uncovered, for 30 minutes on the kitchen counter. While the dough is resting, prepare an oval banneton basket by dusting it generously with bread flour.
After the dough has rested, dust the top of the dough with bread flour and spread it around to create a non-stick barrier on the dough. Flip the dough over so that the sticky side is now facing up. Fold the dough in half like a book and and press the two halves together so that they stick. Then, turn the dough 90° and fold the dough in half like a book once again. Pinch the seam of the dough closed. Your dough should now look like an oval that will fit perfectly into your banneton basket.
The Second Rise (Final Proof)
Cover the dough with a dry kitchen towel or banneton basket liner and let the dough proof for one hour at room temperature. This will give the dough a “head start” on proofing so that it will ferment properly in the cold environment of the fridge.
Note: If your dough already seems to be overproofed before the shaping step, you may want to skip the one hour of proofing at room temperature. Shaping the dough and moving it directly to the fridge is OK and it can stop the dough from becoming too overproofed.
Overnight Cold Proof
Once your dough has risen for one hour at room temperature, move the dough to the refrigerator to proof overnight in the cold environment, for around 8-12 hours. This will build flavor in the dough and the cold dough will be easier to work with the next day.
Baking
The next day, 30 minutes before you’re ready to bake, preheat your oven to 450°F (232°C) with a Dutch oven inside the oven to preheat as well.
When the oven is preheated, take your dough out of the fridge. Flip the dough out of the banneton basket and onto a sheet of parchment paper. Brush off the excess flour from the top of the dough and gently score the top of the dough in one long slash with a razor blade.
Transfer the scored dough into into your hot Dutch oven with the parchment paper and all. Close the Dutch oven lid and bake the bread for 20 minutes. Then, remove the lid and continue baking for another 15-20 minutes with the lid off. After 40 minutes of total baking time my bread was a dark golden brown.
Serving
Let the bread cool for at least one hour on a wire rack before serving. Serve toasted slices of this high hydration sourdough bread with butter, jam, honey, or anything your heart desires. The moist, creamy, custardy interior of this bread is best enjoyed with simple toppings.
Notes
- If your dough already seems to be overproofed before the shaping step, you may want to skip the one hour of proofing at room temperature. Shaping the dough and moving it directly to the fridge is OK and it can stop the dough from becoming too overproofed.