
My favorite kind of bread to make during the week is a rustic loaf of sourdough bread with a darkened crust. This is usually what I make most often. But, there’s something special and indulgent about a soft loaf of sandwich bread baked in a bread pan. From time to time, I love to make a sourdough version of a pullman loaf, one of the USA’s most iconic sandwich breads. In this post, I’ll give you my recipe for a sourdough pullman loaf. But first, what is a pullman loaf?
A pullman loaf is a type of soft sandwich bread baked in a straight-sided pan with a flat lid. The unique bread pan produces square slices of bread instead of ones with a domed top. This style of pan was used by European bakers in the 1800s, and popularized by George Pullman of the Pullman Company.
Pullman Loaf: The Bread Born of Efficiency

Photo by TheSeafarer is licensed under CC BY 2.0.
George Pullman, of Chicago’s Pullman railway company, chose unique, lidded bread pans to be used in the ovens on board his innovative sleeper cars. Apparently, his crew were able to fit three lidded bread pans in the same space required for two traditional loaves of bread with domed tops. So, in an effort to maximize efficiency on board their trains, George Pullman’s company popularized this unique sandwich bread.
Although this type of bread is commonly referred to as a “pullman loaf” in English, similar loaves were also being made in Europe in the 1800s. Thus the French term “pain de mie” (crumb bread) is also often used to talk about this type of loaf.
Traditional Pullman Loaf Ingredients
Pullman loaves are similar to most loaves of homemade sandwich bread. The dough is primarily made with refined white bread flour or all-purpose flour, and it is enriched with some milk, butter, and sugar. Unlike this classic French brioche, Pullman loaves don’t usually contain egg.
Recommended Recipe: Easy Sourdough Brioche (Easy enough to make by hand!)
Substituting Ingredients
While this recipe calls for whole milk, you could easily substitute another dairy milk or non-dairy milk of your choice. Instead of sugar, you could substitute honey, and instead of butter, you could use a neutral vegetable oil.
There are endless ways you could substitute other ingredients for the milk, sugar, and butter in this recipe. Just keep in mind that if the ingredient you are using as a substitute has a strong flavor, it will likely change the flavor of the bread slightly. For example, extra virgin olive or or coconut oil might add noticeable flavors to the bread if used instead of butter.
Use whatever ingredients you have on hand, but for the most “traditional” Pullman loaf taste, stick with whole milk, white sugar, and butter.
Omitting Ingredients
You might also want to leave the butter out of this recipe altogether if you are following a low-fat diet, or one that seeks to limit ingredients like butter and oil. It is possible to omit fat from the recipe, but the bread will not have the same softness and the shelf-life will be slightly decreased.
The same goes for sugar. You can easily omit the sugar from this recipe if you would like, however, the softness and flavor of the bread will not be the same. Omit ingredients if you want to, but know that this will make a different style of bread.
Sourdough Pullman Loaf Recipe
Ingredients
- Bread Flour – 400 grams
- Water – 100 grams
- Whole Milk – 125 grams
- Sourdough Starter – 200 grams
- Butter (Melted) – 50 grams
- Sugar – 25 grams
- Salt – 10 grams
Instructions
Feeding your sourdough starter

Take 25 grams of leftover sourdough starter (room temperature or from the fridge) and feed it 100 grams of bread flour and 100 grams of water. Mix everything together in a jar until well combined and there aren’t any dry bits of flour in the jar.
Mark the top of the starter with a rubber band and let it rest at room temperature (or in a warm spot in your house) for 4-8 hours, or until it doubles in size. When the starter has grown to about double its original size, you can continue on with the recipe and mix it into the dough.
Note: I usually mix my starter in the evening before I go to bed, then the next morning, it’s doubled in size and ready to use in the bread dough!
Mixing the ingredients
Into a mixing bowl, weigh out all of the water, milk, risen sourdough starter, melted butter, sugar, and salt. Stir these ingredients together until they are well combined and the starter is dissolved.

Next, add the bread flour into the mixing bowl with all of the other ingredients.
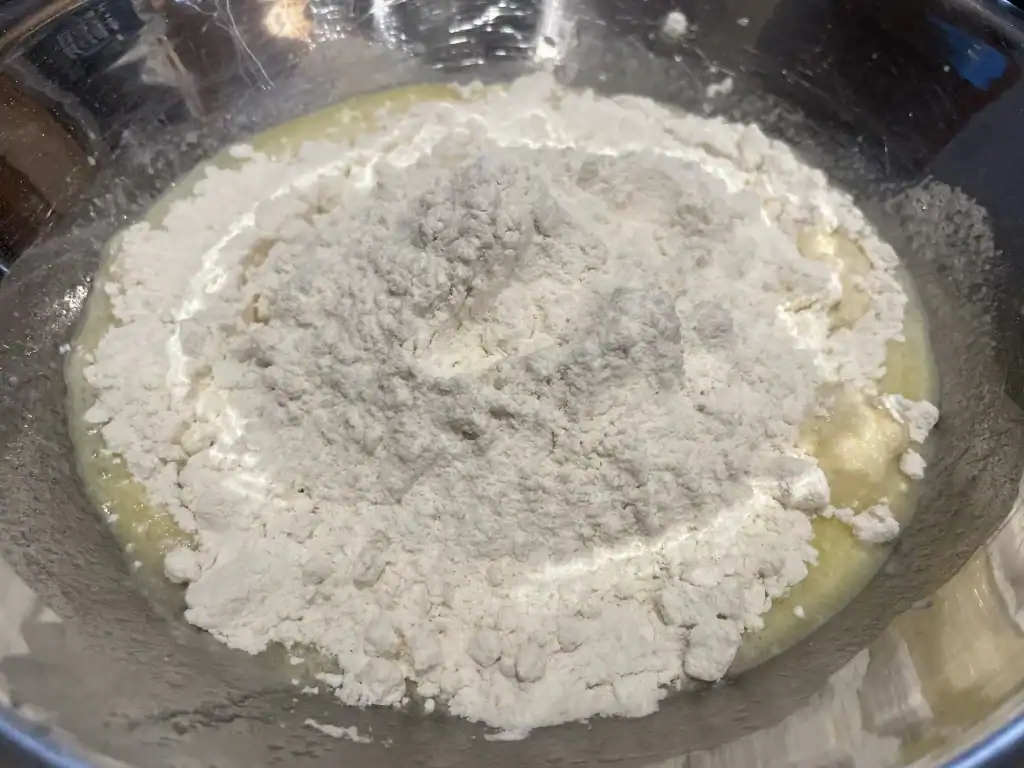
Stir everything together until the flour is hydrated and a rough dough has formed. Scrape down the sides of the mixing bowl.

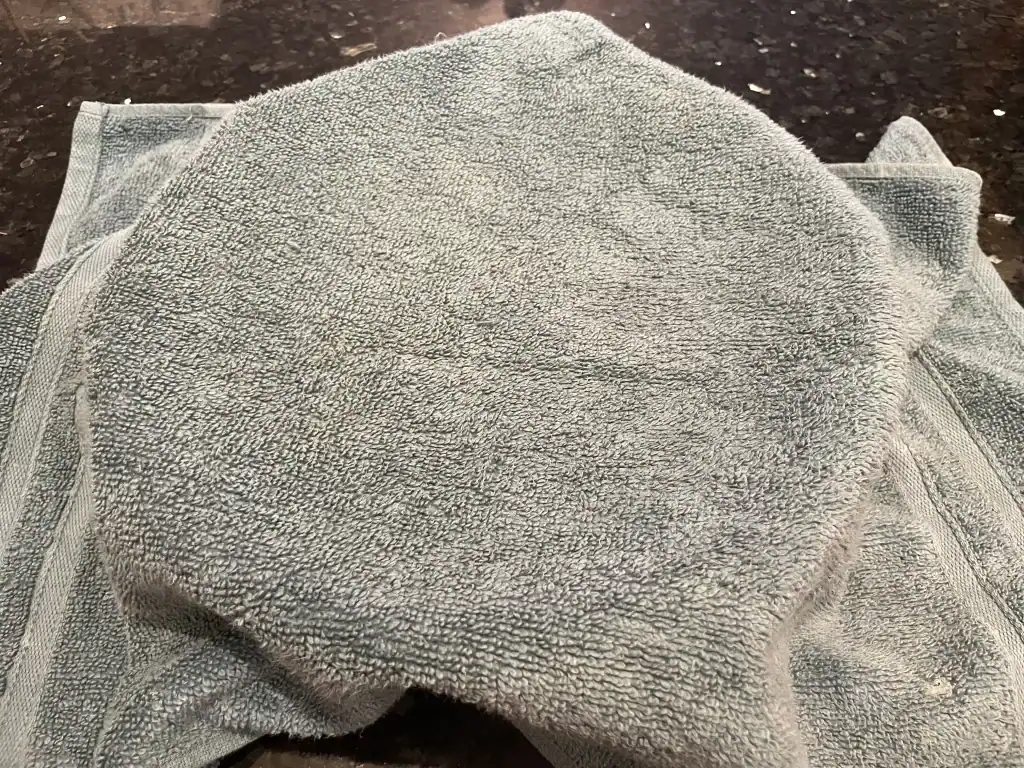
Cover up the bowl with a kitchen towel and let the dough rest for 10-15 minutes. This short rest period will allow the flour to hydrate and help the dough to hold together better during the kneading process.
Kneading
After the short rest, knead the dough by hand for 6-8 minutes either on the kitchen counter or inside of the mixing bowl. The dough should become relatively smooth during the kneading process.

Note: If you don’t want to knead for a long period of time, you can knead the dough for three minutes in the bowl, then let it rest for five minutes, and then knead it again for another three minutes.
Once the dough is kneaded for the correct amount of time, form it into a ball, place it into the mixing bowl, and cover it up with a kitchen towel.
The First Rise (Bulk Fermentation)
Let the dough rise for 3-6 hours at room temperature (or in a warm spot in your house) until it is roughly doubled in size. You don’t knead to do any folding or kneading during this rising period. Just let the dough relax and the sourdough starter will do its magic!
Preparing the Pullman Pan
When the dough is almost fully doubled in size, grease a 2 lb Pullman-style loaf pan with butter or vegetable oil. The Pullman pan that I like to use (see it here on Amazon) is very non-stick, and doesn’t actually need to be greased with butter, but I like to grease the pan for this bread because of the lightly caramelized flavor that the butter provides.
Make sure to grease the bottom, sides, and corners of the pan, and don’t forget to grease the inside of the lid as well.
Shaping
When the dough has risen to roughly twice its size, it should feel somewhat puffy and inflated with air. It’s time to shape the dough for the pan.
Dust your kitchen counter very lightly with flour. Turn the dough out onto the floured counter with the seam side facing up and the smooth side against the counter.
Flatten the dough into a disc, and stretch it into a rectangle that is a little bit smaller than the length of your bread pan. We don’t need airy bubbles in this style of sourdough bread, so it’s OK to knock most the air out.
Take the rectangular dough and roll it into a cylinder. Then transfer the dough into your bread pan with the seam side facing down. Now your dough is shaped and ready to proof!

Proofing
Cover the dough up by putting attaching the Pullman pan lid on top of the pan.
Let the dough proof/rise for 3-6 hours, or until it gets close to reaching the top of the pan. Once it almost reaches the top, it’s ready to bake.

Baking
Preheat your oven to 400°F for at least 30 minutes to ensure that the oven is actually at the right temperature.
Place the dough into the middle rack of the oven with the lid securely on top of the pan. The lid will trap steam around the dough, assuring that it bakes will with a very lightly crisp, and thin crust.
Bake the sourdough Pullman loaf for 45 minutes with the lid on.
After 45 minutes, remove the pan from the oven and take off the lid. Transfer the bread out of the pan and onto a wire rack. If the bread is golden brown on the outside and has reached an internal temperature of 190°F (measured with a probe thermometer), then it is fully baked and you can let it cool on the wire rack.
If the bread looks a little bit pale and/or the internal temperature doesn’t quite reach 190°F, put the bread on a sheet pan and slide it back into the oven. Keep baking for 5-10 more minutes and then check the temperature of the bread again. After 10 additional minutes baking on a tray, your loaf should be golden brown and ready to cool.
Cooling
Carefully take the loaf of bread out of the oven and transfer it onto a wire rack. Let the bread cool on the wire rack for at least one hour before you slice into the loaf.
Once cooled, slice the loaf with a good bread knife. The knife I use is very affordable and it has worked great for years. Check it out on Amazon here.
Even without a great bread knife, this sourdough pullman loaf would be easy to slice! Because the square pan traps steam around the loaf while it’s baking, it doesn’t have much time to form a thick crust, leaving you with a delicate, thin-crusted, and easy-to-slice loaf of sourdough bread.

You’ll enjoy the lightly sweet and complex flavors of this sourdough sandwich bread. This bread is perfect for a peanut butter and jelly sandwich or a good slice of buttered toast.
Notes
What type of flour should I use for a pullman loaf?
As a general rule, you can use bread flour or all-purpose flour to make a pullman loaf. Higher protein bread flour will make a slightly chewier loaf, and lower protein all-purpose flour will make a slightly more tender loaf.
For your reference, the flour I used for this recipe was King Arthur brand bread flour which has a 12.7% protein content. Other brands of bread flour with a similar protein content should produce similar results. This recipe is very versatile, however, so you can feel free to use other types of bread flour or all-purpose flour.

Can I add whole grain flour to this recipe?
Yes, you can add a percentage of whole grain flour to this recipe. I would recommend using 25 grams of whole wheat flour and 425 grams of bread flour. This will give the loaf a slightly more complex flavor than a standard Pullman loaf.
Can I use a stand mixer for this recipe?
Yes, you can use a stand mixer to knead the dough for this recipe. Instead of kneading by hand, mix the dough on low to medium speed for 6-8 minutes in a stand mixer until the gluten is well developed. Then, form the dough into a smooth ball with your hands and continue with the bulk fermentation step.
Video Tutorial: Sourdough Pullman Loaf
Sourdough Pullman Loaf

This is a sourdough version of one of America's most iconic sandwich breads, the Pullman loaf. Baked in a straight-sided pan with a lid, this bread has square slices, a delicately thin crust, and a soft and fluffy interior. It's perfect for a PB&J or for packing a school lunch.
Ingredients
- Bread Flour – 400 grams
- Water – 100 grams
- Whole Milk – 125 grams
- Sourdough Starter – 200 grams
- Butter (Melted) – 50 grams
- Sugar – 25 grams
- Salt – 10 grams
Instructions
Feeding the starter
- Take 25 grams of leftover sourdough starter (room temperature or from the fridge) and feed it 100 grams of bread flour and 100 grams of water. Mix everything together in a jar until well combined and there aren't any dry bits of flour in the jar.
- Mark the top of the starter with a rubber band and let it rest at room temperature (or in a warm spot in your house) for 4-8 hours, or until it doubles in size. When the starter has grown to about double its original size, you can continue on with the recipe and mix it into the dough.
Note: I usually mix my starter in the evening before I go to bed, then the next morning, it's doubled in size and ready to use in the bread dough!
Mixing the dough
- Into a mixing bowl, weigh out all of the water, milk, risen sourdough starter, melted butter, sugar, and salt. Stir these ingredients together until they are well combined and the starter is dissolved.
- Next, add the bread flour into the mixing bowl with all of the other ingredients.
- Stir everything together until the flour is hydrated and a rough dough has formed. Scrape down the sides of the mixing bowl.
- Cover up the bowl with a kitchen towel and let the dough rest for 10-15 minutes. This short rest period will allow the flour to hydrate and help the dough to hold together better during the kneading process.
Kneading
- After the short rest, knead the dough by hand for 6-8 minutes either on the kitchen counter or inside of the mixing bowl. The dough should become relatively smooth during the kneading process.
Note: If you don’t want to knead for a long period of time, you can knead the dough for three minutes in the bowl, then let it rest for five minutes, and then knead it again for another three minutes.
- Once the dough is kneaded for the correct amount of time, form it into a ball, place it into the mixing bowl, and cover it up with a kitchen towel.
The First Rise
- Let the dough rise for 3-6 hours at room temperature (or in a warm spot in your house) until it is roughly doubled in size. You don’t knead to do any folding or kneading during this rising period. Just let the dough relax and the sourdough starter will do its magic!
Preparing the Pullman Pan
- When the dough is almost fully doubled in size, grease a 2 lb Pullman-style loaf pan with butter or vegetable oil. The Pullman pan that I like to use (see it here on Amazon) is very non-stick, and doesn’t actually need to be greased with butter, but I like to grease the pan for this bread because of the lightly caramelized flavor that the butter provides.
- Make sure to grease the bottom, sides, and corners of the pan, and don’t forget to grease the inside of the lid as well.
Shaping
- When the dough has risen to roughly twice its size, it should feel somewhat puffy and inflated with air. It’s time to shape the dough for the pan.
- Dust your kitchen counter very lightly with flour. Turn the dough out onto the floured counter with the seam side facing up and the smooth side against the counter.
- Flatten the dough into a disc, and stretch it into a rectangle that is a little bit smaller than the length of your bread pan. We don’t need airy bubbles in this style of sourdough bread, so it’s OK to knock most the air out.
- Take the rectangular dough and roll it into a cylinder. Then transfer the dough into your bread pan with the seam side facing down. Now your dough is shaped and ready to proof!
Proofing
- Cover the dough up by putting attaching the Pullman pan lid on top of the pan.
- Let the dough proof/rise for 3-6 hours, or until it gets close to reaching the top of the pan. Once it almost reaches the top, it’s ready to bake.
Baking
- Preheat your oven to 400°F for at least 30 minutes to ensure that the oven is actually at the right temperature.
- Place the dough into the middle rack of the oven with the lid securely on top of the pan. The lid will trap steam around the dough, assuring that it bakes will with a very lightly crisp, and thin crust.
- Bake the sourdough Pullman loaf for 45 minutes with the lid on.
- After 45 minutes, remove the pan from the oven and take off the lid. Transfer the bread out of the pan and onto a wire rack. If the bread is golden brown and reaches 190°F with a probe thermometer, it’s fully baked and you can let it cool on the wire rack.
- If the bread looks a little bit pale and/or the internal temperature doesn’t quite reach 190°F, put the bread on a sheet pan and slide it back into the oven. Keep baking for 5-10 more minutes and check the bread again. After 10 additional minutes baking on a tray, your loaf should be golden brown and ready to cool.
Cooling
- Carefully take the loaf of bread out of the oven and transfer it onto a wire rack. Let t=he bread cool on the wire rack for at least one hour before you slice into the loaf.
- Once cooled, slice the loaf with a good bread knife.
- Even without a great bread knife, this sourdough pullman loaf would be easy to slice! Because the square pan traps steam around the loaf while it’s baking, it doesn’t have much time to form a thick crust, leaving you with a delicate, thin-crusted, and easy-to-slice loaf of sourdough bread.
- Enjoy the lightly sweet and complex flavors of this sourdough sandwich bread. This bread is perfect for a peanut butter and jelly sandwich or a good slice of buttered toast.
Notes
- I usually mix my starter in the evening before I go to bed, then the next morning, the starter is doubled in size and ready to use in the bread dough.
- If you don’t want to knead for a long period of time, you can knead the dough for three minutes in the bowl, then let it rest for five minutes, and then knead it again for another three minutes.
- While this recipe calls for whole milk, you could easily substitute another dairy milk or non-dairy milk of your choice.
- Instread of bread flour, you can use all-purpose flour or a mixture of bread flour and all-purpose flour.
- Instead of sugar, you could substitute honey
- Instead of butter, you could substitute a neutral vegetable oil.
- While it's possible to make substitutions, changing too many ingredients may alter the flavor or texture of the dough, so for best results, stick as close to the original recipe as possible.