For almost a year I thought that getting an ear on sourdough bread was all about the scoring. So, I would score my dough at a shallow angle, and for almost a year I was disappointed with the result. Then, after many more months of practice, the truth that I discovered is this: there’s more to it than just the shaping; for an attractive ear to be formed, you need to nail the fermentation, the shaping, and the scoring of your dough – not just the scoring. A sourdough ear is possible if you follow the right steps.
Here are five steps you need to follow to get an ear on your sourdough bread. I have been following these basic steps for almost five years now, and they almost never fail.
How to Get an Ear on Sourdough Bread (5 Steps)
1. Stop Bulk Fermentation at the Right Time
When you get the the “bulk fermentation” stage or the first rise while making sourdough bread, you need to let the dough rise until it is about doubled in size. There’s a bit of a range that you can fall into and be OK, but you don’t want to let the dough rise for much more or much less than this.
Allowing your dough to bulk ferment to about double in size will give your dough the potential power it needs to BURST open in the oven. This “oven spring,” as it is called, is essential for achieving the coveted ear that you’re looking for.
Some of My Favorite Baking Tools (Affiliate Links):
Baker of Seville Bread Lame
Oval Banneton Basket
Non-Stick Bread Pan
Non-Stick Focaccia Pan
2. Shape Your Dough with Good Surface Tension
During the pre-shape and the final shaping steps, be sure to create plenty of surface tension across the top of the dough. This will encourage your sourdough bread to rise upward in the oven and to burst open along the score mark that you will make later.
Don’t underestimate the importance of shaping with surface tension. It’s likely what caused my loaves to end up flat and sad for so long in the first year that I was making sourdough bread.
For the pre-shape step, after your dough has finished bulk fermentation. Shape the dough into a ball on the counter. With your hands or a bench scraper, cup and pull the dough to create surface tension that points toward the center of the ball of dough. Then, let the dough rest for 30 minutes before the final shaping. See my video above for a demonstration of the pre-shaping.
For the final shaping step, sprinkle the top of the dough with a little bit of flour and flip the dough over. Then, shape the dough into a oval shape (or “batard”) with plenty of surface tension running left and right across the short end of the loaf. See the video above for a visual demonstration.
After shaping, you can transfer your dough to an oval-shaped banneton basket and move on to the proofing stage.
3. Stop Proofing When the Dough Still Has Room Left to Grow
To get an ear on your sourdough bread, you’ll need to stop your dough from proofing when the dough still has some room left to grow. This can be achieved by proofing at room temperature until the dough has risen by about 25-50%, or by proofing in the refrigerator for 8-12 hours.
If your dough grows too large during the final proofing step, it won’t have enough room to grow when it bakes in the oven. Since we want it to burst open in the oven along the score mark, we need to leave the dough some room to grow.
My favorite method for this is to allow the dough to rise for about 45 minutes to 1 hour at room temperature, then I put it in the fridge overnight for 8-12 hours. The next day it bakes up perfectly and has plenty of good oven spring.
You can also move your dough directly to the fridge after shaping. Or, you can do a room temperature proof, watching the dough carefully and baking it once it grows to 25-50% of its original volume.
4. Score Your Dough with One Long Slash at a Shallow Angle
Starting at one end of the dough, cut a small incision in the dough with a razor blade and make a slash from one end of the dough to the other. Hold the blade at roughly a 45° angle and keep the score mark fairly shallow (around 1/4″ to 1/2″).
When you score your oval-shaped sourdough bread dough with one long slash at a shallow angle, it gives the loaf the perfect place to burst open in the oven to achieve a sourdough ear.
Now everything should be coming together. You have nailed the bulk fermentation (giving the dough power for good oven spring), you’ve shaped your dough with good surface tension (so that the oven spring makes the dough rise upward), you have scored your dough at a shallow angle (which lets your dough know to create an ear) – there’s only one step left.
5. Bake with Steam for the First Half of the Baking Time
Bake your sourdough bread in a Dutch oven with the lid on for the first half of the baking time. The steamy environment will allow your dough to rise to its full potential which contributes to a sourdough ear. If you bake without steam, the dry heat may cause the bread’s crust to harden prematurely and the loaf won’t rise fully.
To bake with steam using a Dutch oven, I bake my bread for 20 minutes at 450°F with the lid on, and then I remove the Dutch oven lid and continue baking for 15-20 minutes. This provides a steamy environment for the dough to bake in which allows it to rise to its full potential.
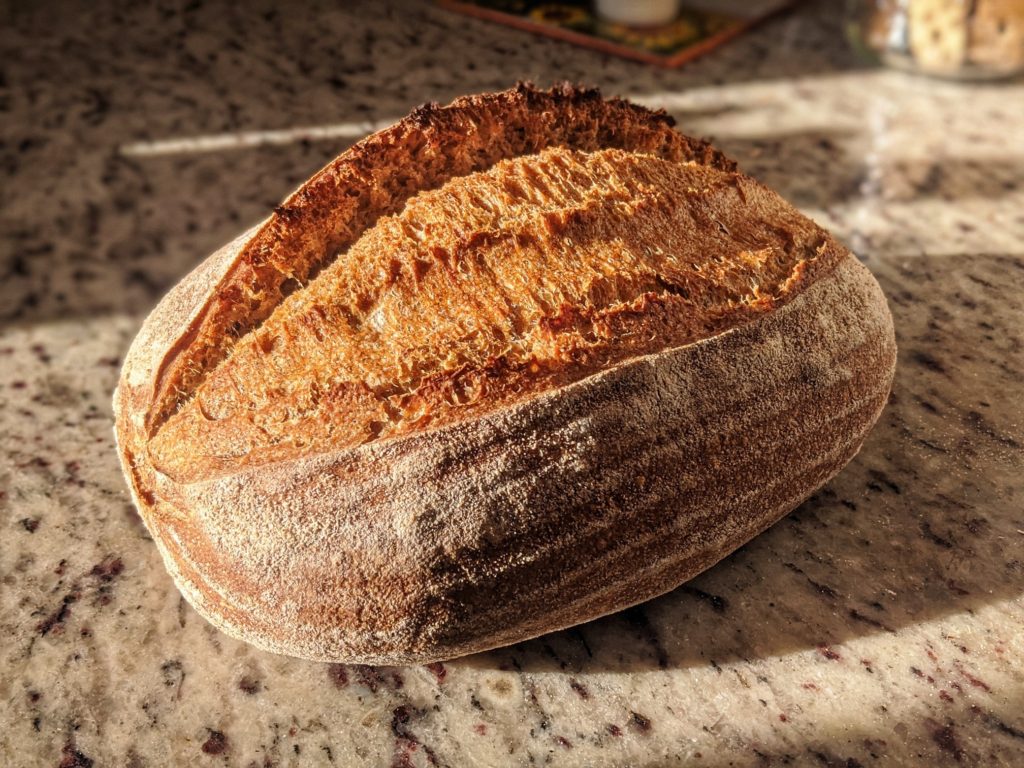
Getting the Perfect Sourdough Ear
If you’ve struggled to get a sourdough ear in the past, following these five steps should result in a drastic improvement to your bread’s oven spring and help you get an ear on your sourdough bread.