As a lover of both savory focaccia and sweet brioche breads, I decided it was time to combine these two amazing breads and make a dessert focaccia that features the best of both worlds! Enter my chocolate focaccia recipe!
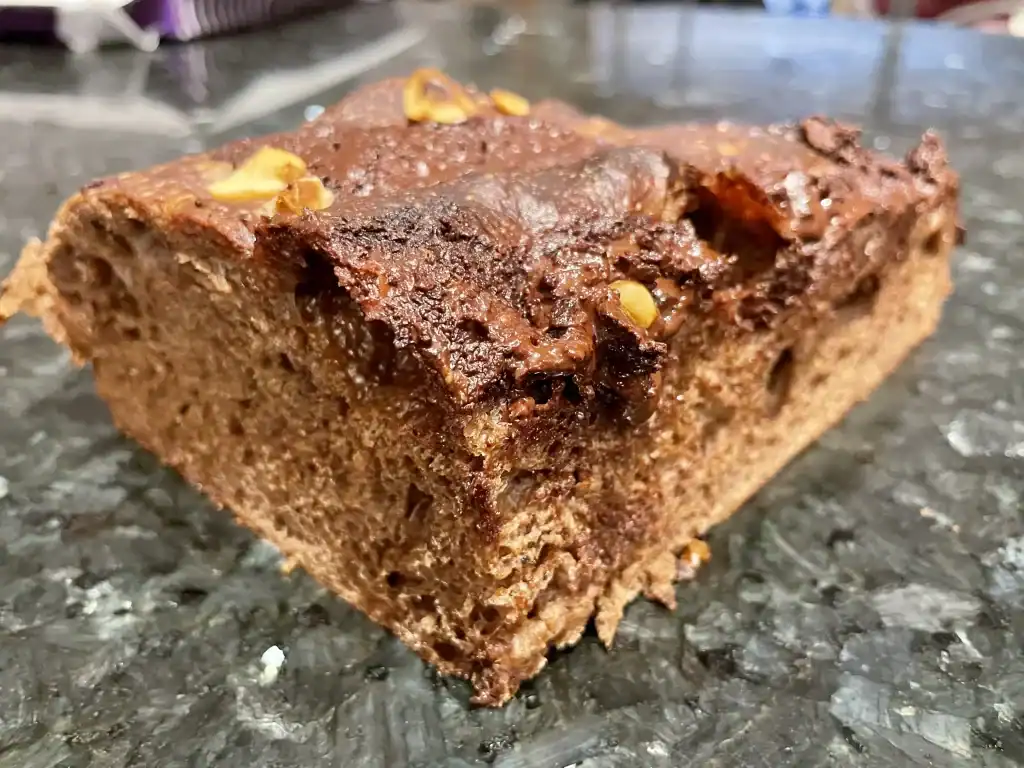
This focaccia is made from a sweet, chocolaty, enriched dough, and it’s baked with crunchy, toasted hazelnuts and dark chocolate chunks on top. The result is a bubbly, sweet, and decadent focaccia that you can proudly serve for dessert.
The best part about this recipe is that you can make it with sourdough starter, for a slightly more complex flavor, or if you don’t have a starter, you can make an easy “yeasted preferment” with instant yeast. Either option will work perfectly for this recipe. You’ll just need to feed your sourdough starter or prepare your yeasted preferment the night before you want to make the focaccia.
Ingredients Needed
For the Starter or Yeasted Preferment
- Bread Flour – 50 grams
- Water – 50 grams
- Leftover Sourdough Starter – 25 grams (or 1/8 tsp of Instant Yeast)
For the Dough
- Bread Flour – 220 grams
- All Purpose Flour – 200 grams
- Cocoa Powder – 30 grams
- Salt – 10 grams
- Water – 310 grams
- Sourdough Starter or Yeasted Preferment – 100 grams
- Sugar – 75 grams
- Olive Oil – 25 grams
For the Toppings
- Dark Chocolate Chunks – 25 grams (for topping)
- Chopped Hazelnuts – 25 grams (for topping)
Step-by-Step Instructions
Preparing the Sourdough Starter or Yeasted Preferment
Sourdough option: Mix together 25 grams of leftover sourdough starter with 50 grams of water and 50 grams of bread flour in a clean glass or plastic jar.
Instant yeast option: Mix together 1/8 tsp of instant yeast with 50 grams of water and 50 grams of bread flour.
Stir everything together thoroughly until there aren’t any dry bits of flour left. Cover up the jar loosely with a lid and mark the top of the starter/preferment with a rubber band. This will help you to see how much it grows overnight.
4-8 hours later, the starter or preferment should have grown to about double its original size and it will be ready to use in this chocolate focaccia dough.
Mixing the Dough
In a large mixing bowl, add all of the bread flour, all purpose flour, cocoa powder, and salt. Mix these ingredients together with a whisk or a fork until the cocoa and salt is spread throughout the flour.
In a separate mixing bowl, prepare your “liquid” ingredients. Add the 310 grams of water, 75 grams of sugar, and 100 grams of sourdough starter or yeasted preferment (save the olive oil for later).
Note: If you’re using sourdough starter, you should have a little bit of starter left over. Reserve this in the fridge for the next time you want to make sourdough bread.
Stir the liquid ingredients together until the sugar dissolves and the water becomes milky in color.
Now, carefully pour the dry ingredients into the wet ingredients, mixing little by little until the ingredients form a cohesive dough without any clumps. The dough might seem fairly wet and sticky at this point, but that is OK.
Cover the mixing bowl with a kitchen towel, and let the dough rest for 30 minutes. This rest period will help the dough hold together better when you add the oil later.
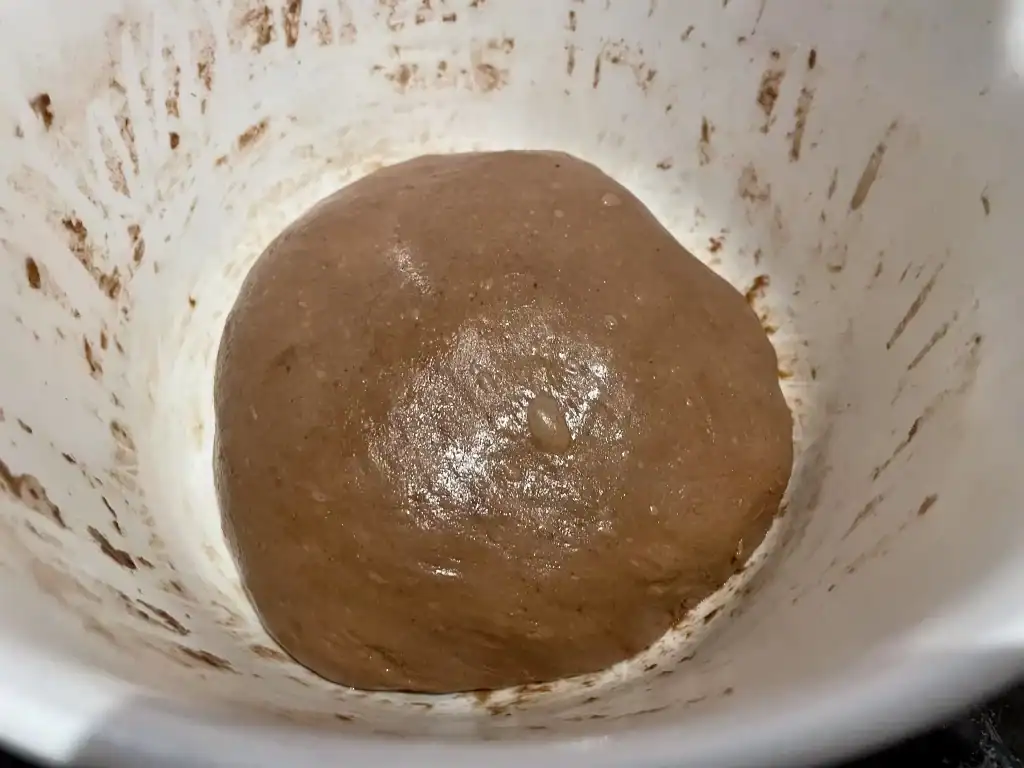
After the 30 minute rest, add in 25 grams of olive oil right on top of the dough. Squeeze the oil into the dough with your hands. After about 30 seconds of squeezing and incorporating the oil with your hands, form the dough into a ball. The dough should form a smooth ball with a slightly slick surface.
Recommended Recipe: For my standard Sourdough Focaccia recipe, click here to check out my ebook, No-Nonsense Sourdough. It’s full of 18 of my favorite sourdough recipes with no unnecessary steps and no complicated terminology.
The First Rise (Bulk Fermentation)
Once your dough comes together as a smooth ball, and all of the oil is absorbed into the dough, cover the bowl up with a kitchen towel and let the dough rest for 30 minutes. Throughout the first rise, you’re going to be giving the dough two sets of stretch and folds with 30 minutes of rest in between each set.
After the 30 minute rest, grab an edge of the dough and pull it up and over the center. Grab the next edge of the dough and pull it over the center again. Keep moving around the dough until each edge is puled over the center and the dough starts to feel stronger and to give some resistance when you pull on it. When the dough starts to resist, cover it up again with a kitchen towel and let the dough rest for 30 minutes.
After the final half-hour rest, give the dough one more set of stretch and folds. Do the same thing you did before: grab an edge of the dough and stretch it up in the air and fold it over the center. Go around the dough stretching and folding until the dough starts to give resistance. When you feel resistance, shape the dough into a smooth ball with the smooth side facing up and the seams facing down in the bowl.
Cover the bowl up again with a kitchen towel and let the dough rise for about 3-6 hours at room temperature (or in a warm spot in your house). You want the dough to roughly double-in-size during this rest period.
Once the dough is doubled in size, you can move it directly to a cake pan for proofing. Alternatively, you can let the dough rest in the fridge overnight in an airtight container. Let the dough continue rising slowly in the fridge for 8-24 hours and take it out the next day whenever you’re ready to continue.
Preparing the Pan
The next day, take the dough out of the fridge and move it to a metal cake pan for proofing. Take out the most non-stick 9″x13″ metal cake pan that you have. Here’s the one I recommend on Amazon. If you don’t have a good non-stick metal pan, it’s best to line your cake pan with parchment paper to avoid sticking.
Grease the bottom and sides of the pan thoroughly with about 25 grams (2 tbsp) of olive oil. If you’re using parchment paper, just spread the oil over the parchment.
Proofing
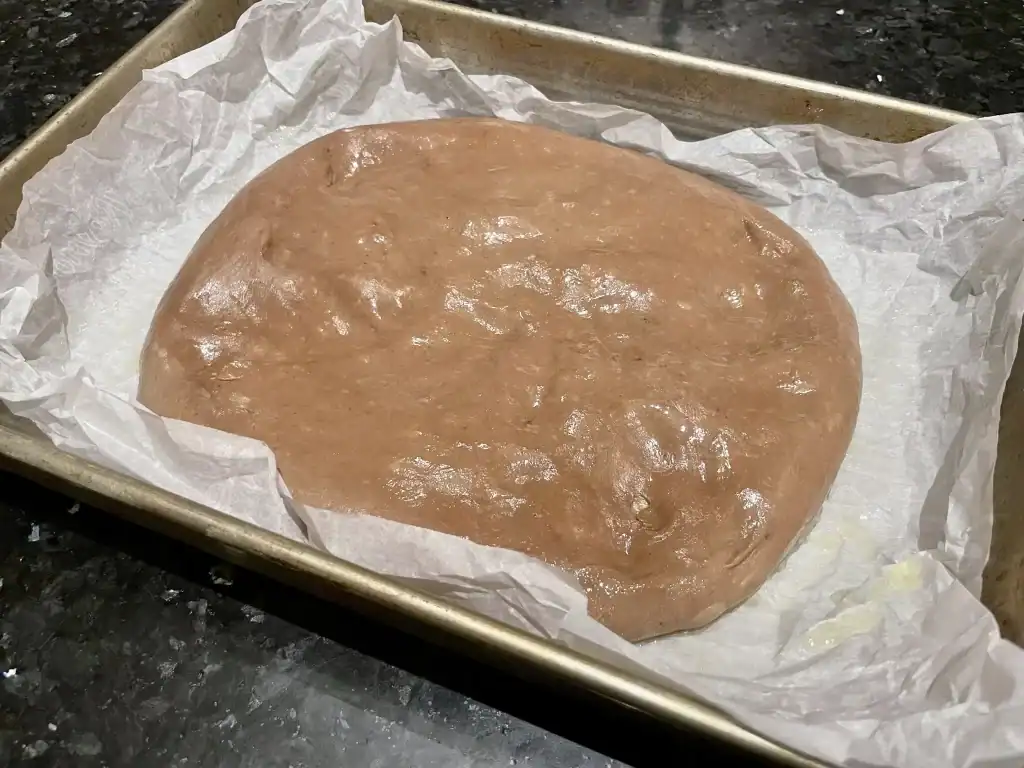
Once the pan has a good amount of oil spread on the bottom and sides, transfer the chocolate focaccia dough into the pan with the smooth side facing up. Gently pull the dough out into a rectangular shape to fit the pan. The dough likely won’t stretch very far at this point, so if it doesn’t reach the edges of the pan, that’s OK. It will puff up and fill the pan while it’s proofing.
Cover up the pan with a kitchen towel or a sheet of plastic wrap. Let the dough proof for about 3-6 hours at room temperature (or in a warm spot in your house). When the dough is done proofing and ready to bake, it will have doubled-in-size and it will be jiggly when you shake the pan.
Once the chocolate focaccia reaches the bubbly and jiggly stage, it’s time to dimple the dough and add some toppings.
Dimpling and Topping the Chocolate Focaccia
First, preheat your oven to 450°F with the oven rack in the center of the oven. Let the oven preheat for about 30 minutes. When your oven is preheated, you can dimple your focaccia.
Pour another 20-25 grams (about 2 tbsp) of olive oil on top of the dough. Gently wet your fingertips in the olive oil, and dimple the dough all over with your fingertips.
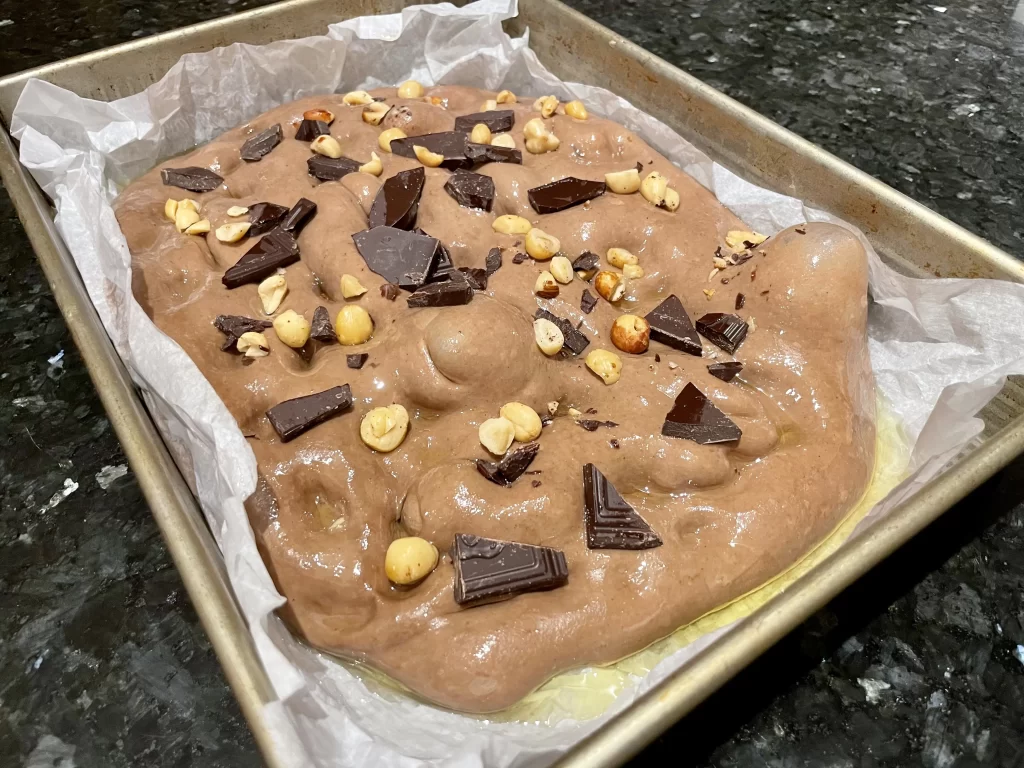
Press down firmly into the dough with the flat part of your fingertips until you can feel the bottom of the pan. Don’t press through the dough, just dimple it down until you feel the bottom. Keep dimpling until there are small dimples all throughout the dough.
Now, sprinkle the top of the focaccia with your favorite sweet toppings. I used 25 grams of dark chocolate chunks and 25 grams of chopped hazelnuts.
Baking
Once your focaccia is dimpled and topped, slide it into the middle rack of your preheated oven. Bake for 25-30 minutes at 450°F, rotating the pan halfway through if your oven heat is uneven.
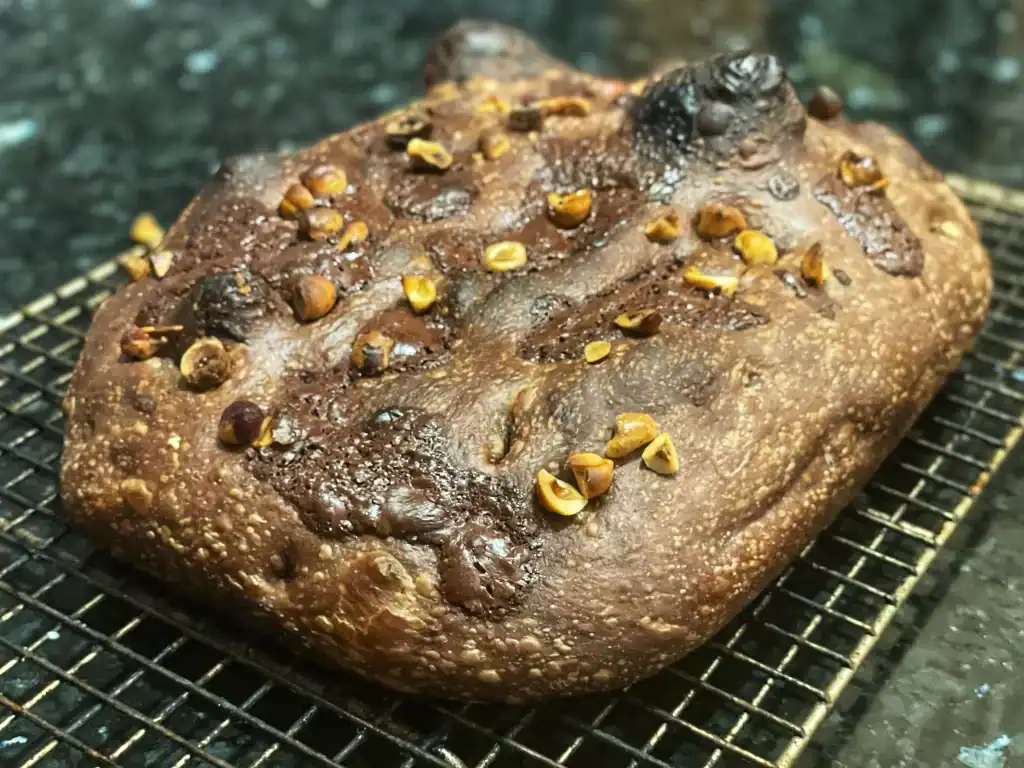
Remove the pan from the oven and carefully remove the focaccia from the pan with a spatula. If you used parchment paper, you can lift the focaccia out with the parchment paper. Transfer the chocolate focaccia onto a wire rack to cool for at least one hour.
Slice the chocolate focaccia into strips or squares and enjoy! You can also top this with additional toppings after baking. Whipped cream, chocolate sauce, maraschino cherries, and peanut butter are a few ideas. I hope you enjoy this recipe! Below is the video tutorial and the printable, written recipe.
Video Tutorial: Chocolate Focaccia (Yeast or Sourdough)
Chocolate Focaccia (Yeast or Sourdough)

This chocolaty, enriched, dessert focaccia is a cross between a chocolate brioche and an Italian focaccia. It's chocolate focaccia, and you can make it with yeast or sourdough starter.
Ingredients
- Bread Flour - 220 grams
- All Purpose Flour – 200 grams
- Cocoa Powder – 30 grams
- Salt – 10 grams
- Water – 310 grams
- Sourdough Starter or Yeasted Preferment – 100 grams
- Sugar – 75 grams
- Olive Oil – 25 grams (plus more for the pan and topping)
- Dark Chocolate Chunks - 25 grams
- Chopped Hazelnuts - 25 grams
Instructions
Preparing the Sourdough Starter or Yeasted Preferment
- Sourdough option: Mix together 25 grams of leftover sourdough starter with 50 grams of water and 50 grams of bread flour in a clean glass or plastic jar.
- Instant yeast option: Mix together 1/8 tsp of instant yeast with 50 grams of water and 50 grams of bread flour.
- Stir everything together thoroughly until there aren’t any dry bits of flour left. Cover up the jar loosely with a lid and mark the top of the starter/preferment with a rubber band. This will help you to see how much it grows overnight.
- 4-8 hours later, the starter or preferment should have grown to about double its original size and it will be ready to use in this chocolate focaccia dough.
Mixing the Dough
- In a large mixing bowl, add all of the bread flour, all purpose flour, cocoa powder, and salt. Mix these ingredients together with a whisk or a fork until the cocoa and salt is spread throughout the flour.
- In a separate mixing bowl, prepare your “liquid” ingredients. Add the 310 grams of water, 75 grams of sugar, and 100 grams of sourdough starter or yeasted preferment (save the olive oil for later). Note: If you’re using sourdough starter, you should have a little bit of starter left over. Reserve this in the fridge for the next time you want to make sourdough bread.
- Stir the liquid ingredients together until the sugar dissolves and the water becomes milky in color.
- Now, carefully pour the dry ingredients into the wet ingredients, mixing little by little until the ingredients form a cohesive dough without any clumps. The dough might seem fairly wet and sticky at this point, but that is OK.
- Cover the mixing bowl with a kitchen towel, and let the dough rest for 30 minutes. This rest period will help the dough hold together better when you add the oil later.
- After the 30 minute rest, add in 25 grams of olive oil right on top of the dough. Squeeze the oil into the dough with your hands. After about 30 seconds of squeezing and incorporating the oil with your hands, form the dough into a ball. The dough should form a smooth ball with a slightly slick surface.
The First Rise (Bulk Fermentation)
- Once your dough comes together as a smooth ball, and all of the oil is absorbed into the dough, cover the bowl up with a kitchen towel and let the dough rest for 30 minutes. (Throughout the first rise, you’re going to be giving the dough two sets of stretch and folds with 30 minutes of rest in between each set.)
- After the 30 minute rest, grab an edge of the dough and pull it up and over the center. Grab the next edge of the dough and pull it over the center again. Keep moving around the dough until each edge is puled over the center and the dough starts to feel stronger and to give some resistance when you pull on it. When the dough starts to resist, cover it up again with a kitchen towel and let the dough rest for 30 minutes.
- After the final half-hour rest, give the dough one more set of stretch and folds. Do the same thing you did before: grab an edge of the dough and stretch it up in the air and fold it over the center. Go around the dough stretching and folding until the dough starts to give resistance. When you feel resistance, shape the dough into a smooth ball with the smooth side facing up and the seams facing down in the bowl.
- Cover the bowl up again with a kitchen towel and let the dough rise for about 3-6 hours at room temperature (or in a warm spot in your house). You want the dough to roughly double-in-size during this rest period.
- Once the dough has doubled, either move the dough directly to a cake pan for proofing, or store the dough in an airtight container in the fridge until the next day when you're ready to continue. The dough can easily be stored in the fridge for 8-24 hours without overproofing.
Preparing the Pan
- The next day, take the dough out of the fridge and move it to a cake pan for proofing. Use the most non-stick 9″x13″ metal cake pan that you have. If you don’t have a good non-stick metal pan, it’s best to line your cake pan with parchment paper to avoid sticking.
- Grease the bottom and sides of the pan thoroughly with about 25 grams (2 tbsp) of olive oil. If you’re using parchment paper, just spread the oil over the parchment.
Proofing
- Once the pan has a good amount of oil spread on the bottom and sides, transfer the chocolate focaccia dough into the pan with the smooth side facing up. Gently pull the dough out into a rectangular shape to fit the pan. The dough likely won’t stretch very far at this point, so if it doesn’t reach the edges of the pan, that’s OK. It will puff up and fill the pan while it’s proofing.
- Cover up the pan with a kitchen towel or a sheet of plastic wrap. Let the dough proof for about 3-6 hours at room temperature (or in a warm spot in your house). When the dough is done proofing and ready to bake, it will have doubled-in-size and it will be jiggly when you shake the pan.
- Once the chocolate focaccia reaches the bubbly and jiggly stage, it’s time to dimple the dough and add some toppings.
Dimpling and Topping the Chocolate Focaccia
- First, preheat your oven to 450°F with the oven rack in the center of the oven. Let the oven preheat for about 30 minutes. When your oven is preheated, you can dimple your focaccia.
- Pour another 20-25 grams (about 2 tbsp) of olive oil on top of the dough. Gently wet your fingertips in the olive oil, and dimple the dough all over with your fingertips.
- Press down firmly into the dough with the flat part of your fingertips until you can feel the bottom of the pan. Don’t press through the dough, just dimple it down until you feel the bottom. Keep dimpling until there are small dimples all throughout the dough.
- Now, sprinkle the top of the focaccia with your favorite sweet toppings. I used 25 grams of dark chocolate chunks and 25 grams of chopped hazelnuts.
Baking
- Once your focaccia is dimpled and topped, slide it into the middle rack of your preheated oven. Bake for 25-30 minutes at 450°F, rotating the pan halfway through if your oven heat is uneven.
- Remove the pan from the oven and carefully remove the focaccia from the pan with a spatula. If you used parchment paper, you can lift the focaccia out with the parchment paper. Transfer the chocolate focaccia onto a wire rack to cool for at least one hour.
- Slice the chocolate focaccia into strips or squares and enjoy as a fun dessert! You can even top this focaccia after baking with things like whipped cream, chocolatate sauce, maraschino cherries, or peanut butter for an extra indulgent kick. I hope you enjoy this recipe!