Many people say you need to use high-protein bread flour to make bagels with the right chewy texture – not true! With this recipe, you can make perfectly chewy-on-the-inside, crispy-on-the-outside bagels with all-purpose flour.

Why This Recipe Works
Less Water = Stronger Dough = Chewier Bagels
Instead of relying on high-protein (AKA high gluten) bread flour to make these bagels chewy, this recipe produces chewy bagels by using a smaller amount of water than other recipes. The lower water content helps turn the all-purpose flour into a strong dough, and a stronger dough leads to chewier bagels.

Ingredients You’ll Need

- All-Purpose Flour: The only flour you need for this recipe is standard, all-purpose flour. Unbleached flour is best if you have it. All-purpose flour in the USA typically has a moderate amount of protein anyway, so it’s not too far off from bread flour. If you’ve already got all-purpose flour on hand, this recipe is for you!
- Water: Fresh tap water or spring water is best.
- Honey: Bagels call for a small amount of sweetener in the dough, and I prefer to use honey. Check the substitutions section below for alternatives you can use.
- Salt: Use kosher salt or sea salt.
- Instant Yeast: Any brand of instant yeast will work great.
- Sesame Seeds, Everything Bagel Seasoning, or Other Toppings
Note: Check recipe card below for full ingredient amounts and quantities.
Substitutions and Additions
- Use Active Dry Yeast instead of Instant Yeast: If you have active dry yeast at home, you can use a packet of that for this recipe instead of instant yeast. You can use this ingredient the same way you would instant yeast, but if you want to ensure that it isn’t expired, mix the yeast with the water and honey first and wait ten minutes. If the active dry yeast begins to look foamy, it should be working and you can continue with the recipe.
- Use Another Sweetener instead of Honey: You can use brown sugar, white sugar, molasses, or barley malt syrup instead of honey in this recipe as a 1:1 replacement.
Ingredient Amounts
Main Dough
- All-Purpose Flour – 500 grams (4 cups + 2 Tbsp)
- Water – 260 grams (1 cup + 1 Tbsp)
- Honey – 20 grams (1 Tbsp)
- Salt – 10 grams (2 tsp)
- Instant Yeast – 7 grams (2 1/4 tsp)
Toppings
- Sesame Seeds or Other Toppings – 70 grams (1/2 cup)
Suggested Timeline
| Time | Step |
| 7:00 PM (Day 1) | Mixing the Dough |
| 7:15 PM | Kneading |
| 7:30 | The First Rise (Bulk Fermentation) |
| 9:30 PM | Dividing and Shaping |
| 10:00 PM | Proofing (Overnight) |
| 8:00 AM (Day 2) | Boiling and Baking |
Step-by-Step Instructions
Mixing the Dough
- In the mixing bowl of a stand mixer, add all of the water, honey, salt, and instant yeast. Mix together to dissolve the ingredients into the water.
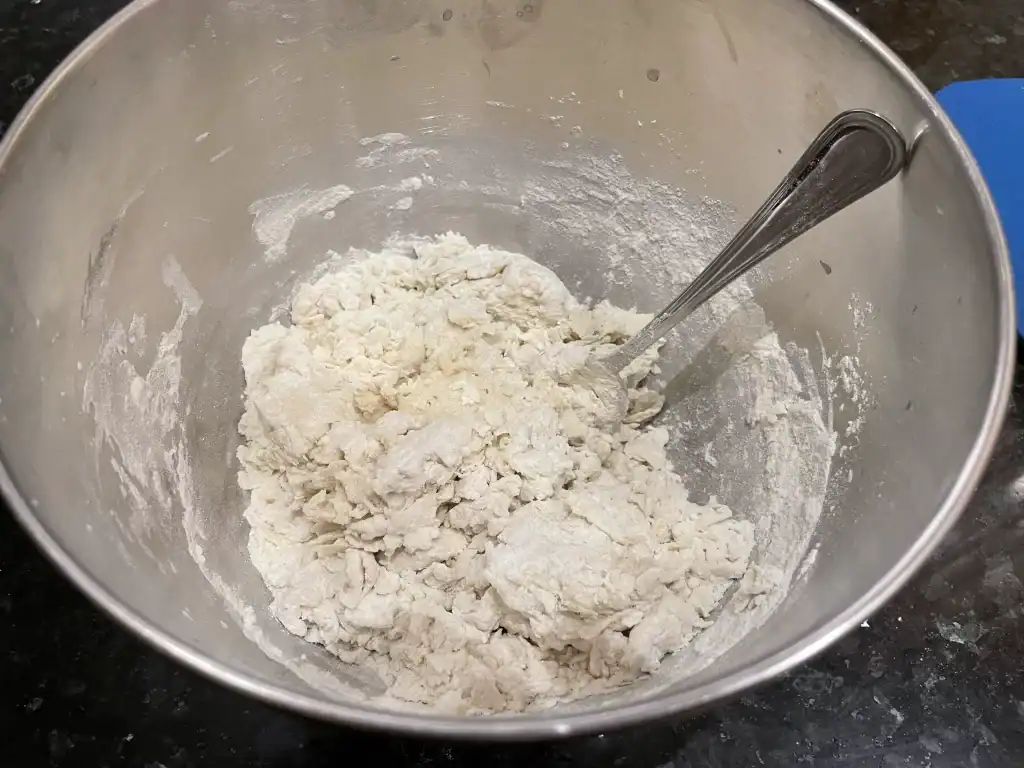
- Add all of the all-purpose flour and mix with a spoon until a dough comes together. The dough will still be very dry and shaggy at this point.
Kneading
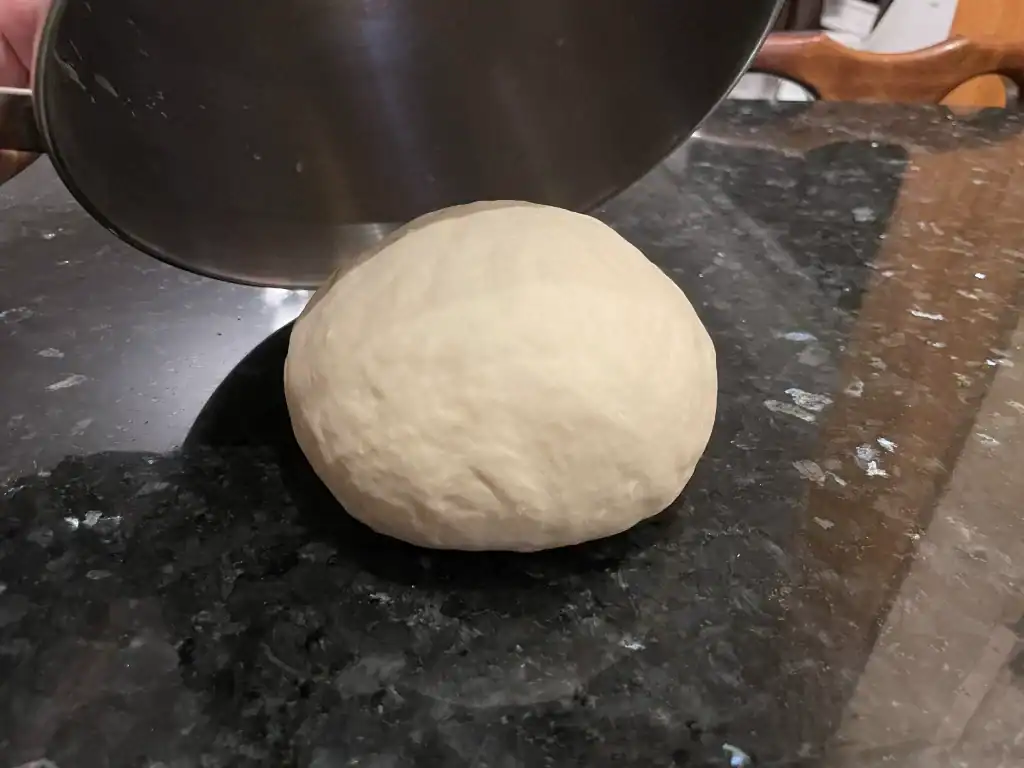
- Stand Mixer Option: Move the dough to a stand mixer fitted with a dough hook attachment. Knead the dough on low speed for one minute, and then on medium speed for seven minutes. Once fully kneaded, the dough will hold together, look smooth, and feel only slightly tacky to the touch.
- Hand-Kneading Option: Knead the dough by hand on the counter for 8-10 minutes. Keep kneading until the dough is smooth and don’t add any flour to the counter during kneading; extra flour will make the dough too dry.

Note: The stand mixer may have trouble picking up all of the pieces of this very dry dough. Squeeze the dough together with your hands half-way through the kneading time if you notice that the dough is falling apart. This will help the dough hold together and form a smooth ball.

The First Rise (Bulk Fermentation)
- Shape the kneaded dough into a tight ball with your hands and place it on the kitchen counter. Cover up the dough with the mixing bowl or another airtight cover.
- Let the dough rise at room temperature for 2-3 hours, or until the dough has doubled in size.
Dividing and Shaping
- After the dough has doubled in size, flatten the dough and divide it into equal sized pieces with a bench scraper or a knife. Divide the dough into 6 pieces for large NYC-style bagels, or divide it into 12 pieces for smaller bagels.
Note: I divided the dough for this recipe into 12 pieces, which produced smaller bagels. These small bagels were still a great “English Muffin” size, perfect for a breakfast sandwich, and we got to have more bagels for the week!

- Roll each piece of dough into a smooth ball and place them on the counter. Cover up the dough balls with a kitchen towel and let them rest for 30 minutes. This will allow the gluten to “relax” and the dough will be easy to shape later.
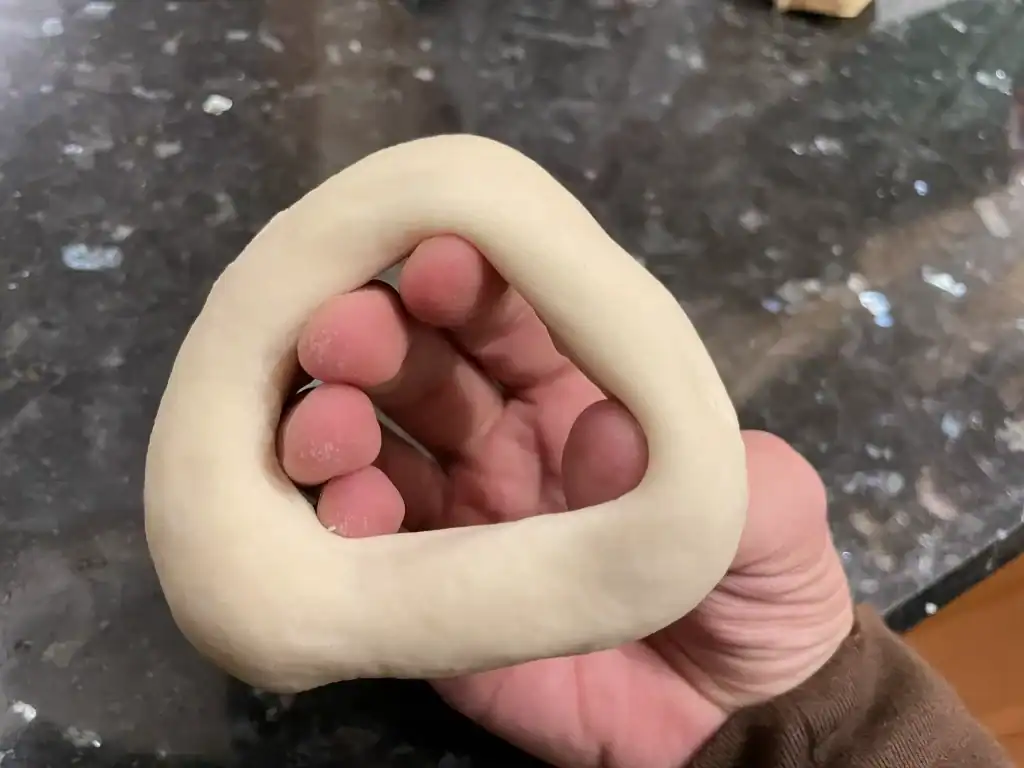
- After the 30 minute rest, uncover the dough and form each ball into a bagel-shaped ring. Press a finger into the top of the dough balls and pierce the dough through to the bottom. Once a hole is running through the dough, gently stretch out the dough and form a ring. If you’re new to this shaping technique, your first couple of bagels might look uneven, but you’ll get better as you go.
- Lay down the shaped bagel rings onto a sheet pan lined with a sheet of parchment paper. I used two standard half-sized sheet pans for 12 bagels, but you only need one pan if you’re making 6 bagels.
Proofing
- Cover up the bagels with an oiled sheet of plastic wrap (a little bit of oil will keep the plastic from sticking to the dough). Plastic wrap will help keep the dough from drying out and cracking on top.
- Overnight Proof Option: Move the pans of shaped bagels into the fridge to rest and rise overnight (for 8-12 hours). A long cold proof in the fridge is common for New York bagel shops, and it’s thought to give the bagels a more well-developed flavor.
- Same-Day Proof Option: To make your bagels on the same day, let them rise on the sheet pan at room temperature for 2-3 hours, or until they look nearly doubled in size and they feel like they’ve filled up with air.

Boiling and Baking
- When you’re ready to cook your bagels, preheat the oven to 450°F (232°C) and set a large pot of water to boil. There should be enough water in the pot that the bagels won’t touch the bottom of the pan as they float on the surface.
- As the water is coming to a boil, prepare your bagel toppings. In a medium bowl, add the sesame seeds, everything bagel seasoning, or any other seeds that you are using to coat your bagels. You will dip each bagel in the seasonings directly after boiling.
- When the water is boiling, gently place 3-6 bagels into the pot (as many as can fit without touching). Let the bagels boil for one minute on each side. Use a slotted spoon or spider tool to flip the bagels over.

Note: If the bagels don’t float in the water within the first few seconds, it means they haven’t proofed long enough and they’ll likely end up dense instead of light and chewy. A properly proofed bagel will be full of air, so it will float in the hot water. Let your bagels proof for another 1-2 hours at room temperature if the first one doesn’t float.
- After boiling each bagel for one minute per side, dip each of them into your desired toppings and transfer them back onto the parchment-lined sheet pan.

- Slide the sheet pan into the middle rack of your preheated oven (or the middle and lower rack if using two pans). Bake large bagels for 20 minutes and small bagels for 12-14 minutes, or until golden brown.
- Allow bagels to cool on a wire rack for 10-15 minutes before serving.
Serving and Storing Tips: Bagels with All-Purpose Flour
- Serving Fresh: In my opinion, these bagels are best served sliced open while they are still warm from the oven and slathered with butter. Fresh bagels taste great even without being toasted, but toasting works here too.
- Serving Day-Old: These bagels with all-purpose flour are also great the next day. Slice a bagel open, toast each side, and serve with butter, cream cheese, and any of your favorite bagel toppings. Toasting day-old bagels is beneficial here because it “brings the bagel back to life.”
- Storing for 1-2 Days: For short term storage, keep bagels un-sliced at room temperature in a plastic bag, or in a breathable bread bag.
- Storing for up to a Month: For long term storage, keep bagels un-sliced and in an airtight plastic bag in the freezer. Allow bagels to thaw in the fridge overnight, the night before you plan to eat them. Then in the morning, slice the bagels and toast them. (Keeping the bagels un-sliced will go a long way to prevent freezer burn.)
Bagels with All-Purpose Flour

With this recipe, you can make perfectly chewy-on-the-inside, crispy-on-the-outside bagels with all-purpose flour. (No bread flour required.)
Ingredients
Dough Ingredients
- All-Purpose Flour - 500 grams (4 Cups + 2 Tbsp)
- Water - 260 grams (1 Cup + 1 Tbsp)
- Honey - 20 grams (1 Tbsp)
- Salt - 10 grams (2 tsp)
- Instant Yeast - 7 grams (2 1/4 tsp)
Toppings
- Sesame Seeds or Other Toppings - 70 grams (1/2 Cup)
Instructions
Mixing the Dough
- In the mixing bowl of a stand mixer, add all of the water, honey, salt, and instant yeast. Mix together to dissolve the ingredients into the water.
- Add all of the all-purpose flour and mix with a spoon until a dough comes together. The dough will still be very dry and shaggy at this point.
Kneading
- Stand Mixer Option: Move the dough to a stand mixer fitted with a dough hook attachment. Knead the dough on low speed for one minute, and then on medium speed for seven minutes. Once fully kneaded, the dough will hold together, look smooth, and feel only slightly tacky to the touch.
- Hand-Kneading Option: Knead the dough by hand on the counter for 8-10 minutes. Keep kneading until the dough is smooth and don’t add any flour to the counter during kneading; extra flour will make the dough too dry.
Note: The stand mixer may have trouble picking up all of the pieces of this very dry dough. Squeeze the dough together with your hands half-way through the kneading time if you notice that the dough is falling apart. This will help the dough hold together and form a smooth ball.
The First Rise (Bulk Fermentation)
- Shape the kneaded dough into a tight ball with your hands and place it on the kitchen counter. Cover up the dough with the mixing bowl or another airtight cover.
- Let the dough rise at room temperature for 2-3 hours, or until the dough has doubled in size.
Dividing and Shaping
- After the dough has doubled in size, flatten the dough and divide it into equal sized pieces with a bench scraper or a knife. Divide the dough into 6 pieces for large NYC-style bagels, or divide it into 12 pieces for smaller bagels.
Note: I divided the dough for this recipe into 12 pieces, which produced smaller bagels. These small bagels were still a great “English Muffin” size, perfect for a breakfast sandwich, and we got to have more bagels for the week!
- Roll each piece of dough into a smooth ball and place them on the counter. Cover up the dough balls with a kitchen towel and let them rest for 30 minutes. This will allow the gluten to “relax” and the dough will be easy to shape later.
- After the 30 minute rest, uncover the dough and form each ball into a bagel-shaped ring. Press a finger into the top of the dough balls and pierce the dough through to the bottom.
- Once a hole is running through the dough, gently stretch out the dough and form a ring. If you’re new to this shaping technique, your first couple of bagels might look uneven, but you’ll get better as you go.
- Lay down the shaped bagel rings onto a sheet pan lined with a sheet of parchment paper. I used two standard half-sized sheet pans for 12 bagels, but you only need one pan if you’re making 6 bagels.
Proofing
- Cover up the bagels with an oiled sheet of plastic wrap (a little bit of oil will keep the plastic from sticking to the dough). Plastic wrap will help keep the dough from drying out and cracking on top.
- Overnight Proof Option: Move the pans of shaped bagels into the fridge to rest and rise overnight (for 8-12 hours). A long cold proof in the fridge is common for New York bagel shops, and it’s thought to give the bagels a more well-developed flavor.
- Same-Day Proof Option: To make your bagels on the same day, let them rise on the sheet pan at room temperature for 2-3 hours, or until they look nearly doubled in size and they feel like they’ve filled up with air.
Boiling and Baking
- When you’re ready to cook your bagels, preheat the oven to 450°F (232°C) and set a large pot of water to boil. There should be enough water in the pot that the bagels won’t touch the bottom of the pan as they float on the surface.
- As the water is coming to a boil, prepare your bagel toppings. In a medium bowl, add the sesame seeds, everything bagel seasoning, or any other seeds that you are using to coat your bagels. You will dip each bagel in the seasonings directly after boiling.
- When the water is boiling, gently place 3-6 bagels into the pot (as many as can fit without touching). Let the bagels boil for one minute on each side. Use a slotted spoon or spider tool to flip the bagels over.
Note: If the bagels don’t float in the water within the first few seconds, it means they haven’t proofed long enough and they’ll likely end up dense instead of light and chewy. A properly proofed bagel will be full of air, so it will float in the hot water. Let your bagels proof for another 1-2 hours at room temperature if the first one doesn’t float.
- After boiling each bagel for one minute per side, dip each of them into your desired toppings and transfer them back onto the parchment-lined sheet pan.
- Slide the sheet pan into the middle rack of your preheated oven (or the middle and lower rack if using two pans). Bake large bagels for 20 minutes and small bagels for 12-14 minutes, or until golden brown.
- Allow bagels to cool on a wire rack for 10-15 minutes before serving.
Notes
- The stand mixer may have trouble picking up all of the pieces of this very dry dough. Squeeze the dough together with your hands half-way through the kneading time if you notice that the dough is falling apart. This will help the dough hold together and form a smooth ball.
- I divided the dough for this recipe into 12 pieces, which produced smaller bagels. These small bagels were still a great “English Muffin” size, perfect for a breakfast sandwich, and we got to have more bagels for the week!
- If the bagels don’t float in the water within the first few seconds, it means they haven’t proofed long enough and they’ll likely end up dense instead of light and chewy. A properly proofed bagel will be full of air, so it will float in the hot water. Let your bagels proof for another 1-2 hours at room temperature if the first one doesn’t float.